This afternoon as we were digging out the backyard, we uncovered a live grub. (This was a better find than yesterday's small, dead worm.) I picked it up and showed it to Bug, who recoiled and declared that he didn't want to see or touch it because it was "too yucky".
I commented that some people eat grubs. Bug thought this was fascinating and asked if I could cook the grub for him.
Me: "You don't want to touch it because it's too yucky, but you want to eat it?"
Bug: "I want to touch it with my mouth."
Grubs were NOT on the menu for today... (Though I did find a decent sounding recipe should it come up again. The idea kind of turns my stomach, but I'd try it if my kids really wanted to.)
Wednesday, January 19, 2011
Tuesday, January 18, 2011
Yummiest. Lemonade. Ever.
It went too quickly to get pictures!
Mom and Art went to California to visit his family awhile ago and came back with a LOT of absolutely beautiful Meyer lemons. (Which I think I have a photo of somewhere... hrm...) We've been using them, but not all that quickly and Mom was kind of worried that they were going to end up going bad before they were used.
Richard and Bug to the rescue!
After last weeks orange juice, they were ready to squeeze. :)
Turning the lemon juice into lemonade fell to me. I was kind of worried about messing up - even though I know that lemonade is basically lemon juice, water and lots of sugar - so I poked around online a little bit and looked over a handful of recipes to see where the similarities were. It pretty much ended at lemon juice, water and sugar. ;)
Richard and Bug squeezed just shy of two cups of lemon juice. I boiled two cups of water, dissolved one cup of sugar into that and, AFTER the sugar was dissolved, poured the lemon juice in. Once that was nicely combined, I added four cups of cold water and decanted into pitchers.
Even though I only used half of the sugar recommended by a large portion of the recipes that I'd seen, it was still REALLY sweet. Richard ended up watering his down whenever he poured a glass. I kind of like my sweet. ;) (As a note, Meyer lemons are sweeter than other varieties, so the 2:2:1 ratio should result in a not-as-sweet lemonade if using different lemons.)
Enjoy and I'll try to get some pictures next time. We still have lemons!
Tuesday, January 4, 2011


Wednesday, December 29, 2010
Conversations from the Back Seat
A conversation with Bug:
Bug: "I don't like fingernails."
Me: "You don't like fingernails?"
Bug: "Nope. They're not good."
Me: *pause* "You mean to eat?"
Bug: "Yeah."
Bug: "I don't like fingernails."
Me: "You don't like fingernails?"
Bug: "Nope. They're not good."
Me: *pause* "You mean to eat?"
Bug: "Yeah."
Sunday, December 26, 2010
Easy-Peasy Truffles
I hope everyone had a really nice time celebrating their winter holiday of choice. :)
We had a really great time and I'm looking forward to sharing some pictures a little later. Right now I'm just too wiped out to resize photos, so I'll talk about food instead. No pictures because it was all DEVOURED, but I made some yummy truffles to contribute to the holiday food selection. It's becoming a bit of a tradition. :)
I know that this recipe came from somewhere, but it's been a few years and I couldn't say where. Apologies. I'd like to offer credit where it's due.
These truffles are SO STINKIN' GOOD...and remarkably simple. You need baking chocolate - in a form that will melt - and cream cheese. Whatever amount of cream cheese you want to use, have double the amount of chocolate. Or equal parts of two different chocolates.
Melt 1/2 of your chocolate. I do this on the stove so that I can watch it, but I suppose you could do it in the microwave and just keep an eye on it. You don't want it to burn.
Once the chocolate is melted, mix in your cream cheese. (I tried this over low heat this time because I was using a block of cream cheese and it worked out okay. Just watch your heat.)
Once the cream cheese and melted chocolate are mixed together, put it in the fridge to cool. About two hours.
When the chocolate and cream cheese mixture have set up a bit, remove from the fridge and melt the last half of your chocolate. Form balls of the chocolate and cream cheese mixture and dip in the melted chocolate. Set aside for coating to harden and then enjoy.
I tried something different this year and used almond bark for the truffle innards and Wilton meltaways for the coating. They turned out nicely when the finished product was stuck in the freezer, but I wouldn't recommend it for truffles you'd like to leave out for the grabbing. The almond bark had a lot more oil/fat in it and never really solidifed the way I'm used to. Luckily, the meltaways hardened and held the truffles together. Next time, I'll just spring for the good chocolate to begin with. (In the past I've used both Hershey and Ghirardelli. Both work beautifully.)
Tuesday, December 21, 2010
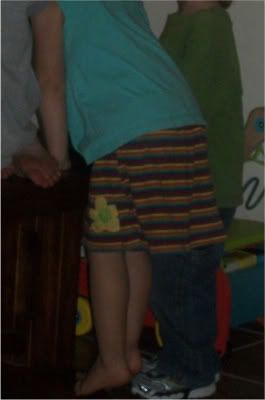
Skirt in Action
So it turns out that my niece likes the skirt I made for her birthday. (Yay!)
She was wearing it when we went over the other day and I tried to get a picture...but three year olds rarely stand still...
She was wearing it when we went over the other day and I tried to get a picture...but three year olds rarely stand still...

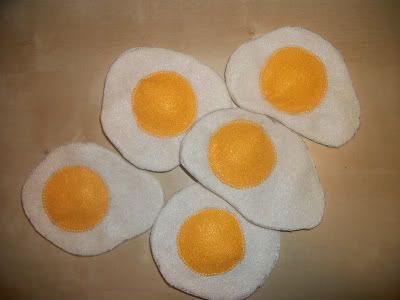
Felt Eggs and a Sort-Of Tutorial
I've been in love with play food for awhile. We started collecting it when Bug was about eight months old. (We got an awesome crocheted set of fruit and veggies from my friend Crystal at Loin Cloth. I highly recommend asking her for a set.) When Bug got his play kitchen for Christmas last year, we added a fairly good selection of wooden food. We've never managed any felt food, though I've been eyeballing it for awhile. It's just so cool looking!
After having read a million and four tutorials on making felt (not felted...still out of my league) play food, I decided to take the plunge and try to whip some up in time for Christmas. I'll split what I make between Bug and his best friend back in Texas, who's been really into his kitchen and store set-up.
Here's my take on eggs. And I aplogize if I'm essentially repeating someone else's tutorial. I've read a lot of them and absorbed a lot of tips from different places but ended up winging it. Not trying to steal from anyone. :)
I started with two sheets of off-white and one of yellow-orange poly felt. I would have preferred wool, but it was outside of my budget.
On one sheet of off-white felt, I drew egg-y shapes. I managed five, though with better planning I think I could have gotten six to fit. Sorry, no photo of that step.
I found a round lid that was a good size for the egg-y shapes, and cut circles out of the yellow felt. Pinned them in place on top of the single sheet of off-white.
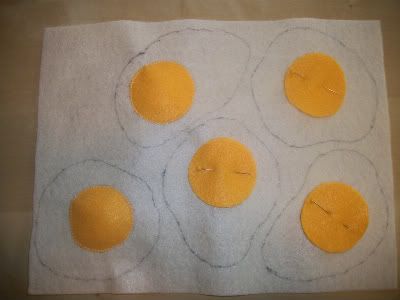
Because I thought it would look nice, I used a zig-zag to stitch the yolks in place.
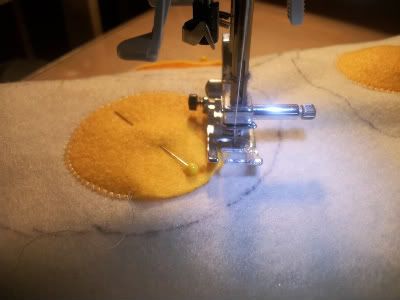
When the yolk pieces were almost sewn into place, I paused and stuffed just a tiny bit of stuffing beneath. I was thrilled to discover bamboo fill but, again, the poly stuff was in my price range. Wool roving or small fabric scraps would also work. Or you could just leave them flat. That looked nice too, but I wanted them a little puffy.
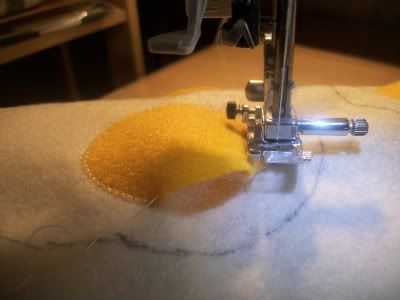
Once all the yolks were sewn into place, I pinned the second off-white sheet of felt to the back (to add a bit of thickness and make them a tiny bit more stiff) and stitched just inside the lines I'd drawn. When all of the eggs had been sewn together, I cut between the stitching and the drawn lines and...voila! Eggs!

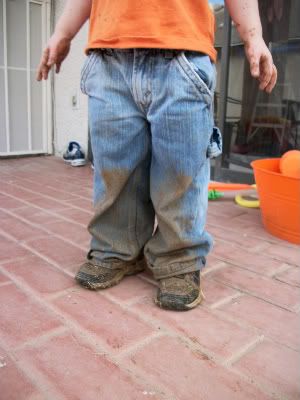
Mud Day
Bug was playing with a bucket of water at the new house a few days ago. Lots of splashy fun and I was kind of surprised by how relatively clean he managed to stay.
And then there was the clean up. In which the bucket of water was dumped out. And we had MUD!
He had a blast!

Check out those shoes. They were the only pair he had that day...
And then there was the clean up. In which the bucket of water was dumped out. And we had MUD!
He had a blast!

Check out those shoes. They were the only pair he had that day...

Subscribe to:
Posts (Atom)


