Sunday, August 5, 2012

Garden Roboot

(Ohmigosh, I still have a blog!)

So, it's full-on summer here in the desert and while I really try to avoid going outside while it's hovering near 115 degrees outside, awhile back I bought a decent sprinkler and a decent timer and now...we kind of have a lawn in the backyard!


Two or three weeks ago, that was nothing but dirt.  We have a very tiny area (maybe 6'x6' or so) that grows year round, but it's generally pretty sickly looking.  I am *ecstatic* that there is this much green in our yard right now!

So, the new growth combined with a dear friend reworking her garden in an even more arid environment has compelled me to take on a garden reboot.  Because ours was just sad and the two little plants that grew this spring have turned into plant skeletons.

So, I took some "Before" photos to peek at when I catch myself thinking that nothing's changed. ;)


This is the garden in the corner of our yard, as it appears right now.  There's grass - yay - but it's all overgrown.  We were in the midst of cutting it when we realized that the whole yard (and I do mean the WHOLE YARD) had become one giant ant bed.  So we're treating for ants (sugar and borax ftw) and it seems to be working quite nicely.

The pond insert has been hanging about for awhile ended up getting propped against the fence during a nasty sand storm.  It will need to go someplace else.  The bird feeder was relocated to the garden a few weeks ago and will need to be moved again.  Getting it off of the patio was an absolute necessity though.  Pigeons are messy.

The garden itself consists of three raised beds.  There's one 4x8 bed that's built but empty, one 4x8 (where the bird feeder lives, now) that's filled and one 4x4 that's filled.  It's hard to see in the photo, but there are skeletons of a tomato plant and sunflower in the 4x4 bed.  (At least the sunflower grew nicely for a bit!)

Early last spring, Bug and I dug out the rock bed near our front door, put down some edging and planted some lavender and ground cover.  It didn't take.  It's kind of been floundering since then so I'm going to try to get that worked out again, too.


I have no idea what plant is that's popped up there on the right.

I did most of the prep work of gathering stuff while Richard was out with the kids, and then called a halt to it because it was 108 degrees outside and I knew that Bug and Boo would want to be involved.  When Boo came home a bit later, we pulled the weeds from all of the spaces - and I was delighted to discover that the soil in the gardens is still in awesome shape! - and found some new ant spots to treat.  I pulled the wild plant from the front door bed, resettled one of the pots, removed the others and broke up the dirt.  The soil there isn't as friendly as I'd like, but between a little new soil and some compost I think it'll be all right.

Bug is already chomping at the bit to get moving with the next steps, so hopefully this project will take off quickly.


Tuesday, June 19, 2012

30 Minute Men's Pants to Boy's Jammies - A Tutorial

I was tempted to title this post "How to Turn a Pair of Way-Too-Big-But-I-Lost-the-Receipt Men's Pajama Pants into a Pair of Boy's Jammie Pants Tutorial"...but that seemed a little long.  Since the pants were based on the 30 minute pants, I shortened it. ;)  And I figured that, instead of just saying "Hey, I chopped these up and made something new", that I'd try working it up as a tutorial, just in case anyone else has a similar pair of way-too-big pants hanging around.

(This is my first attempt at a tutorial quite like this, so please let me know if anything is confusing!)

All you need is a pair of men's pajama pants, and 30-60 minutes, depending on the frequency and length of your distractions.

A little bit of back story...

Back in December, I picked up a pair of pajama pants for Richard.  Yes, I could have made him some myself.  I'd messed about with the idea.  But I was feeling swamped with other projects, I always end up totally frozen by incompetence when I try to sew something for myself or my husband, and Old Navy was running them at such a low price that I couldn't even buy fabric for that little.  So I opted to save myself some stress, time and money and just buy them.  My mistake came when a bout of indecisiveness hit at the store.  I had the perfect pair of pajama pants in my hand, decided against them and hung them back up, then changed my mind again and picked them back up.  Only problem being that, while I had closely checked the size the first time that I picked them up, I didn't when I went back for them.  The size tag on the hanger read medium, but the pants were actually XXL.  WAY too big.  And we put off returning them until I'd lost the receipt, so they've just kind of been hanging around waiting for me to either chop them up or donate them to Goodwill.  Bug decided that he really liked the idea of having matching pajamas with Daddy, so I decided to chop them up.

Here's how:

First, wrangle your small children out of the pants...

I love the look of adoration she has for him here.  We see that face a lot.

Lay out the pants and determine how much length you need for your little person.  Use a pattern that you love to determine how long they need to be.  Keep in mind that you're not going to have to hem the pants because you'll be using the existing hem.  Remove the pants legs with enough length to cut out your new pattern.  (Since I'll still be using the top of the pants to make a pair of shorts for Richard, I also made sure that I had enough length left to do that.)


Cut the pants legs open along the INSIDE seam so that you can lay the fabric out flat.  I would recommend giving them a good pressing here, just to make sure that nothing goes wonky in the next few steps.  I'm a big fan of excessive pressing.

Once the fabric is open and flat, lay the cut open pants legs with RIGHT sides together.  If there was an outer leg seam on the original pair of pants, make sure that you match it up.  I suggest pinning along the seam, if there is one, and making sure that the bottom hems are even.


Lay your pattern piece on top of the flattened pajama fabric, putting the outer seam where it would fall on the finished pair of pants.  I used a pattern of my own making that doesn't usually finish with an outer seam, so made sure that the existing outer seam fell in the center of the pattern piece, along the grain line.


Pin and cut out your pattern.


I suggest marking front and back at this point, just to keep things from getting confusing later.  I always put a safety pin on the outside near the center back seam, but do whatever works for you.

At this point there was mayhem with my little people, so I had to walk away for a moment.  Which necessitates "Remove cat from your fabric" as the next step in my house.

Chin says these are super cozy pants!
Now you'll sew the legs up.  Match up each piece at crotch and hem and sew.  It's all right if they don't match up perfectly, though I do try to make sure that the fabric matches nicely at the hem.  It's a little easier to fix extra fabric at the top of the leg.

Because the fabric on this particular pair of pants is somewhat thin and I worried a little about it falling apart at the hands of my active boy, I opted to put in french seams.  If you trust your fabric, serging would work just as well.

Once both legs are sewn up (and you've pressed that seam open), you'll need to attach them.  Turn one leg inside out and the other right side out.  Because I was doing a french seam, I set them inside one another RIGHT sides together, and then flipped them to WRONG sides together and stitched again.


Now turn the pants inside out and mark your waistband.  Again, because of the lightweight fabric, I wanted to make sure that the stitching wasn't going to pull out, so I marked a fold like 1/2 inch from the top edge, and another 1 inch below that.  Press and pin.


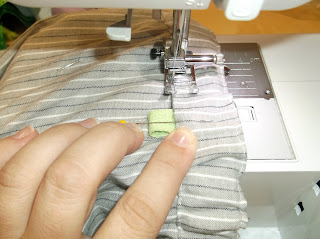
Then stitch your waistband, leaving an opening at center back for elastic.  I like to stitch just at the top edge of the waistband, too, to keep it from rolling around while Bug is wearing them.


Insert your elastic.  Make sure to test the waistband size on your little one, if necessary, and then stitch the ends of your elastic together.


Close the casing and you're all done!  (I added a little twill tape tab, so that Bug could tell front from back.  he admonished me for not adding a frog loves monkey label - ha!)


Try the pants on your little person and then just TRY to get them to take them off!


Sunday, June 17, 2012

Conversations From The Back Seat

In the car, as we left lunch today.  The temp gauge read 112.

Bug: "Mommy, why is my hair wet?"
Me: "That would be sweat."
Bug: "That's the wrong kind of water!"

Friday, June 15, 2012

Attempting to Read

Richard and I took the kids to the library this afternoon.  Given that we were not-entirely-politely tossed out the first and last time I took the kids solo, we opted to tag-team it.  (I'll tell that story later, if anybody's interested.)

I got to wander off by myself for a few minutes and actually look at book titles and read blurbs and everything.  It was kind of cool.  I even picked out a few books, though thinking that I'll be able to scratch out enough time to finish even one is probably silliness.

I'll admit to two of them.


The Queen's Rival by Diane Haeger.  The way this particular library shelves their fiction, it's kind of hard to tell sometimes exactly what genre your book is going to fall into.  This one looks like it's going to be a nice combination of historical, romance and personal redemption, without being too much of any one of them.  I don't expect it to be a particularly light read, but I'm looking forward to it.


Water for Elephants by Sara Gruen.  This is probably gong to sound ridiculous, but I had NO IDEA that a movie of this book had been made, much less one starring Robert Pattinson and Reese Witherspoon.  When did that happen?  (Oh, last year, by the looks of it.  I was a little busy.  Obviously missed it.)  I was going to give some sort of blurb, but I suppose everyone's already seen it. ;)

I picked up a third book too, but it's a poorly written piece of garbage to have on hand for car rides.  Also probably the only one of the three I might have time to finish - sad as that is.

After picking out my books, I went to find Richard in the kid's section.  I was shocked...that place had been stripped clean.  Bug has been reading the Magic Treehouse books and the shelf that used to be full of them was entirely empty, as was every other shelf on the aisle.  Aisle after aisle after aisle in the kid's section was empty.  I thought that perhaps they were rearranging or moving the books elsewhere, but it turns out they've all just been checked out.  Almost all of the chapter books, almost all of the easy reader books, almost all of the board books, almost all of the kid's music and movies.  Stripped clean.  Richard was baffled until I pointed out that it's the first week of summer vacation and 115 degrees outside during the day.  Even mid day on a Thursday, the library was packed.

Bug ended up finding a handful of books that he was excited about (a new Charlie & Lola, his first Ramona book and a few that we've never heard of before), so it ended up being a good trip.  We read a whole bunch of little board books to Boo while we were there, but she generally prefers to hear whatever Bug is reading, so left all of those there for whoever might want them.

I'll go online and put holds on some of the books that we couldn't find for Bug today.  He'll be pretty excited by that, I think.

Thursday, June 14, 2012

Just How Washable is a Washable Crayon?

We're going to find out.  Soon.  Because I walked into my kitchen and found this today.


Boo is my artist.  She also hit the fridge and the kitchen wall with that purple crayon.  I think Bug half expected me to totally blow my top but, well, they're washable.  So...eh.  I told them to have at it and we could clean it up when they were done.

(To her credit, Boo isn't even two yet and the first thing she did when I commented on her having written on the cabinet was go grab a sponge and try to wipe it off.  Sweet girl.)

The finished project, after the introduction of new colors and giddiness that Mom was letting them draw on the cabinetry.


Bug says that's the cats fighting (which, thankfully, they don't really do) on the right-most door.

Wednesday, June 13, 2012

Pillow Talk Swap - Getting There

Fabrics have been decided upon and cut.


And I might need a pedicure. ;)

(First post is here, if you missed the background info.)

Tuesday, June 12, 2012

Pay It Forward

Here's something new. :)  I caught just a little bit of a Pay It Forward blog movement a few days ago and was kind of intruiged.  Didn't go looking for the details at the time, but they kind of landed in my lap tonight, thanks to CraftyRie (via facebook), who pointed to Cas at Sew It Seams, who heard about it from Sally at ::virtu::, who got it from Rie at CraftyRie.  (Still with me?)

So, that seemed like a good sign to maybe jump in. :)

The rules:  (This is a copy and paste, so I make sure to get it right.)


So here's what happens:


I will make a handmade gift for the first 3 interested people who comment on this post.
  • I have 365 days to do it in…
  • What it will be and when it will arrive is a total surprise!
The catch is that you must participate as well:
  • you must have a blog
  • and before you leave your comment here, write up a pay it forward post on your blog to keep the fun going. Just cut and paste this one if you like, which I did! 
So...comment. :)  Link me to your blog post and I'll start plotting to make you something that you'll hopefully find cool or useful or fun.  And I can't wait to see what people get to making for who signs up with them.

And...go!

Monday, June 11, 2012

Pillow Talk Swap

It's been about a year since I've done a swap, and I've recently joined two over on flickr.  Modernista Homemade, a brand new group which I'll post more about very soon, and The Pillow Talk {Swap}.  I've been eyeballing PTS since I first discovered flickr swap groups over two years ago and I'm actually kind of breathless that I was accepted.  Seriously, the level of ingenuity and beauty of design in this group is A-MAZING.  I'm trying very hard to not let my inferiority complex creep in. ;)

My partner filled out her form and put up a great mosaic, but I've still been feeling a bit directionless.  Then I saw this awesome quilt that QuiltDad did, from Lizzy House's Outfox the Fox pattern, and was kind of inspired.

...But how to work it into a 20 inch pillow top?  Hmm...

I fiddled with it.  I mapped.  I sketched.  And I could NOT figure out how to make it fit without it getting all kinds of weird.  Finally, I realized that I was going to have to lop off just a few squares to make it work the way I wanted it to.  I sketched some more, then downloaded a very simple shareware quilt block program to see if I could mock up something that would show the modified design well.  It was in a weird format, so I ended up having to dump it into Paint to post it.  (Which also meant that the colors were pretty garish.)


I posted the graphic pretty late last night and it's gotten good feedback, so I'm moving forward with it for now.  Which meant choosing fabrics.

My partner gave very few clues as to her decorating colors and the items in her photostream and blog didn't really point me to anything in particular.  I *think* she'll like brights though, and I'm certain that a white background would be best, so these are the fabrics I'm considering right now.


I really only need one of the black and white fabrics, but I'm still trying to decide which I like the best.  Hopefully she'll weigh in.

And, lucky for me, if she doesn't care much for the colors, they're PERFECT for my Modernista partner. ;)

New Look

Thought it might be time to change things up, visually, just a little bit.  Like it?

Thursday, June 7, 2012

A Surprise Baby Quilt

Not in the sense that it's for a surprise baby...but that I was surprised to be making it. ;)

I started posting last night over on my shop blog about the Rashida quilt, so-called because I found a little bit of fabric from a line by that name and even though I have ten million (give or take) other things on my plate at the moment, it wanted to become something RIGHT NOW.  I kept petting this little bit of fabric - it was maybe 1/4 yard - and thinking things like "It might make a cute little bag?  Or maybe a skirt for Boo?"  But, no, it wanted to be a quilt.  So I started chopping it up.


Then I added a bit of Kona and a striped fabric that I adore and use as a solid, but have no idea who makes it.  I originally bought the yellow to line a mei tai, but we've ended up using it for so many other things!  (We have it in green, too.  Love it.)


I was able to get the first two rows of a 4x4 layout all sewn and trimmed and attached to one another last night, then finished and attached the rest of the blocks today.  I didn't expect to get any farther than that, but was able to piece together the back, too.  No pictures of that, yet.


Chin hung out on the cutting table for most of the day, holding down the off-cuts for me.  I try to be very careful to not let the cats mess with sewing projects, especially if they're gifts or for the shop, but he was quite content napping on the scraps and it's so rare that he wants to be a part of what's going on during the day, so I let him stay.  He didn't try to get on the quilt once. ;)

Once I got the back finished (which actually happened pretty early in the day), I had these delusions of grandeur in which I was able to baste and quilt it, too.  That was, of course, only in my imagination.  Bug and Boo were kind of all over the place today and sweeping and mopping the floor so that I could lay everything out and then try to get it pinned before someone little came through the room just wasn't going to happen.  I decided to wait until they'd gone to bed, and it's ended up being a VERY late night.  Fingers crossed that I can do it tomorrow, but I'm not holding my breath on that, either.  It'll get done though.  I'm way too excited about this little quilt to let it sit unfinished.

Wednesday, June 6, 2012

Giveaway Day Winner's Apron


It needs a pressing, and then this apron is ready to go on it's way to Laurel, who won our Giveaway Day drawing.  She said that she liked blue and green, and I took a little liberty in adding the red to punch up the palette just a bit.  I hope she likes it. :)

Tuesday, June 5, 2012

Pretty Fabrics

These came in the mail today.  I SO love fabric mail.

"Heirloom" by Joel Dewberry

"The Woodlands" by Khristian Howell


 Technically, these are for the shop.  Buuuuut, I might eke something out of the scraps.  Just sayin'.

Wednesday, May 30, 2012

Dirt Day

Yesterday evening, the kids had some solo play time in the yard.  Mom's been cleaning out her house and brought some stuff over to our house, so we were rearranging and trying to get some computer work done and and and... I went out once and they were digging happily in the dirt.  I went out a little while later and found this.

Chinchilla Girl and Dirt Boy


Yup...dirt bath


And so very happy about it!


And this is what happens when Mommy says "Smile!"
I don't at all mind the dirt...but they absolutely went straight into the bath. ;)

Craft Hope: Project 17 (Part 2)

(Click here for Part 1.)

The Craft Hope aprons are coming along nicely, which is great since it's almost deadline time!  There are seven aprons finished now, with four more sitting on my sewing table waiting for ties, and two more cut out to be stitched together.  I'd hoped to get at least twelve done, so I need to get stitchin'!


A Win!

Well, this was a nice surprise - I won one of the giveaways that was part of Sew, Mama, Sew's Giveaway Day!

I got an email from Heather of quilt.cook.keep. telling me that I was one of the subway art winners.  So cool!

It was difficult to choose a color.  The aqua is just super pretty, I adore the orange and it matches the paint in my kitchen, and it's just hard to go wrong with black.  But, in the end, I chose the aqua.  Since I'm sewing in the dining room - which is yellow and bleeds into the kitchen, which is orange - I was afraid that an orange print would look awkward on the wall.  I ended up choosing aqua.  I think it'll be nice and spring-y in there. :)


Pretty, no?

(Psst!  If you'd like one of your own, Heather sells them in her Etsy shop.)

Tuesday, May 29, 2012

Outside Play

We've been having some fun outside this week, despite the heat.


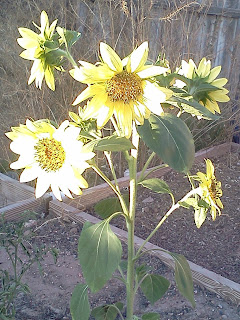
And, look!  Sunflowers!  I wish the tomatoes were doing as well. ;)

Monday, May 28, 2012

Universal Craft Blog

While not strictly a craft blog, I do tend to think of things as being kind of craft-ish around here, so I've linked up with the Universal Craft Blog list.


At the moment, there are over 600 crafty blogs on the list.  That is a LOT of craftiness!  The blogs that I've visited have been really neat, so I'm excited to keep checking them out...and hope that anyone who finds us on the list will be glad that they did. :)

Saturday, May 26, 2012

We Have A Winner!

Before announcing our Giveaway Day winner, I'd like to take a moment to thank everyone who stopped by and entered the contest.  Your comments really made my day(s) and I wish that I had time to respond to each one individually.

But, while I try to get to some of them, I'll announce our winner!

Mr Random.org chose entry #51, Thependragoneyes.  I still haven't figured out how to insert the widget, so I hope you'll take my word for it. Congratulations!  I've sent you a message and can't wait to get started on your apron!

In the event that I haven't heard back from our winner, a new winner will be chosen on Tuesday morning.

Monday, May 21, 2012

May Giveaway Day! - The Giveaway Post

 ***The Giveaway Day post is now CLOSED.  I'll announce the winner in just a bit!  Thank you and good luck to everyone who stopped by and decided to enter!***

Hello, hello!

If you've come over from Sew, Mama, Sew, this is the post that you're looking for.  :)  And if you stumbled over it by happy accident, you picked a really good time, because it's Giveaway Day!


For Giveaway Day, I'm offering up an apron.


My initial plan was to make another like this, which has received a lot of good feedback.  But then it occurred to me that maybe whoever won the giveaway might not actually be a fan of these colors.  So, instead, I'm offering up an apron made specifically for the winner.

I'm not even going to make you jump through a bunch of hoops to enter. :)

If you'd like to be entered in the drawing to win a custom apron, leave a reply to this post stating which of the following fabrics you like the best.


Then let me know which solid colors you like the best.  (Up to three, though I'm not sure that I'll end up using more than two in the finished apron.)

Make sure that I have some way of contacting you, and that's it!  Though, if you'd like to follow the blog, that'd be awesome.  I like to think that people might be interested in what goes on here. ;)

Entries will be accepted through May 25.  (In all honesty, until I can get to the computer on May 26.)  A winner will be chosen at random and announced on My 26 or 27.

Also, I'm doing a giveaway on my shop blog, too.  Check out the frog loves monkey blog and make sure to enter that giveaway, too!

Good luck, and thanks for stopping by!

(And don't forget to check out the rest of the amazing blogs listed over at Sew, Mama, Sew!)

Friday, May 18, 2012

Seed Bombs - Sort of a Tutorial

Today, Bug and I made seed bombs.  I think.

We've been talking about doing it for awhile,  I read a whole bunch of tutorials, then ran out and picked up the things we were missing (just the clay, really).  But I didn't look at any of the tutorials again, so I kind of feel like I left something out.  It was really super easy, and really super fun, and something that the four year old had a whole lot of fun with, too.

If you want to trust it, I'll set this up a bit like a tutorial.  And I'll update once I see how they work out in the world!

(A few real tutorials can be found here, here, and here, if you want to double-check or get a second opinion.)

Here's what Bug and I did...

We gathered:

Compost.  There was a little bit of mulch left in the awesome spinning composter that my sister gave us.  Before I realized that I had picked up a small bag of potting soil, but I'm fairly certain that this project would not have been as successful with regular potting soil.


 We ended up breaking up the larger chunks in our compost, which was really dry, and spreading it onto a work-surface plate to make it easier to handle.  I'd imagine that moister compost would be much easier to work with.


Clay.  As you can see in the first picture, we went with the Crayola air-dry clay.  It was the only brand that I could find and it was labeled as "natural".  I'd have preferred to *know* that it's natural, but since we chose flower seeds and not vegetable seeds, I didn't figure it was *quite* as important.

Seeds.  Make sure that you pick a native and non-invasive species.  We went with a selection of poppies.


Water.  I totally forgot about the water.  Which would have made this whole process SO much easier.  My only excuse is that I was trying to get everything set up as quickly as possible after Boo went down for her nap so that Bug and I could actually get the seed bombs made. 

So, how we did it...

We picked a little bit of the clay and rolled it into a ball...


Then put a depression into the ball (because mashing them into flat circles on the plate made them next to impossible to pick up again - wax paper might have been an better idea) and dropped a few seeds and a little bit of compost into the middle of the ball before rolling it back up again.

Then we rolled the whole thing in the compost, to coat the outside.  In all honesty, I'd hoped for better coverage on the outside.  Pretty sure that forgotten little bit of water would have helped a ton with that.


 Then we set them aside.  In a day or so, they should be dried enough to toss out into the world.

Bug had SO much fun rolling the balls and putting the seeds inside.  He could have cared less about the compost - which was funny considering how excited he is about the compost in general - so he left some of his uncoated.  And then he just started mashing things together and playing with the clay, which was cool.  He sprinkled some chia seeds on his artwork, too.


 Please ignore the mayhem in the background. Our cabinets are in desperate need of a coat of paint and I really should have mopped...but it seemed like a silly thing to do just before we made a big mess with seeds and clay.

This is where we ended with the seed bombs today.


Bug's ready to make more NOW.


If anybody's made seed bombs, or tries some after reading this, I'd love to hear about it!